
Need to Wipe Your eSIMs Clean? Here’s Exactly How to Delete All eSIM Profiles Safely
You’ve been traveling, switching carriers, or maybe you just bought a used phone and want to start fresh. Now you’re staring at a list of eSIM profiles in your settings, wondering how to clear them all out without accidentally bricking your connectivity. The core solution is straightforward: deleting eSIM profiles is a simple, reversible process that removes the digital SIM data from your device, freeing up space and ensuring no lingering profiles cause activation conflicts. In this guide, I’ll walk you through exactly how to delete all eSIMs on both iPhone and Android, explain what happens when you delete an eSIM, and cover the important precautions you need to take before wiping them clean.
First, let’s clarify what an eSIM is and what deleting it actually does. An eSIM—or embedded SIM—is a digital SIM built into your phone that allows you to activate a cellular plan without a physical SIM card. When you delete an eSIM profile, you’re removing that digital connection from your device. The carrier’s record of your plan isn’t affected—you’re simply removing the profile from your phone. If you ever want to use that same eSIM plan again, you’ll typically need to re-download it via a QR code, carrier app, or manual activation. Deleting an eSIM does not cancel your service with the carrier; it just removes the profile from your specific device. That distinction is important: if you’re selling or giving away your phone, deleting your eSIM profiles is essential for protecting your personal information. If you’re just cleaning up old travel eSIMs that are no longer in use, deleting them frees up space in your eSIM storage and removes clutter from your settings.
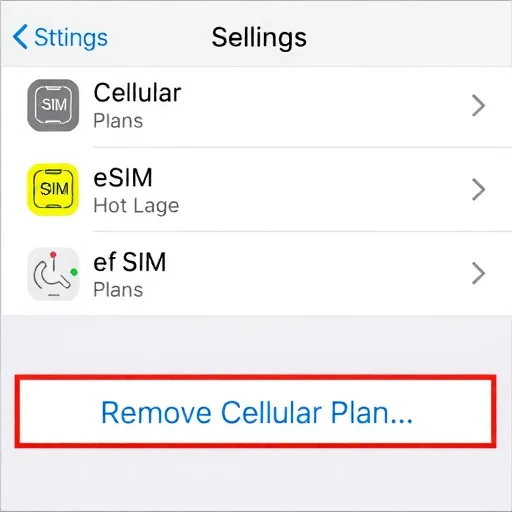
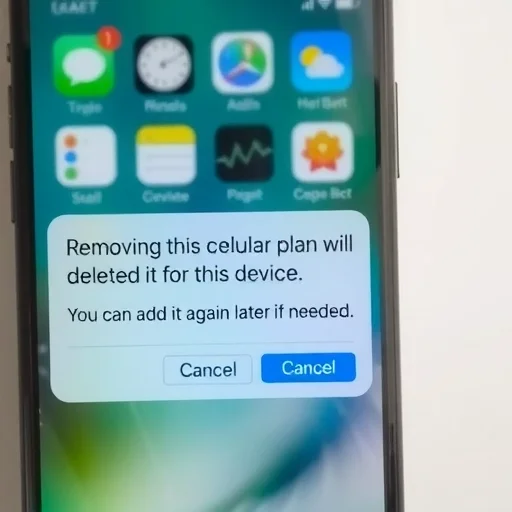
Now, let’s get into the step-by-step process for deleting eSIMs on iPhone. The process is similar across iOS versions, though menu names may vary slightly. First, open Settings. Tap on “Cellular” (or “Mobile Data” depending on your region). You’ll see a list of your cellular plans. Any eSIMs you have installed will appear here, typically labeled with the carrier name or the plan name you assigned. Tap on the plan you want to delete. Scroll to the bottom of that plan’s settings page and tap “Remove Cellular Plan.” A confirmation pop-up will appear asking if you’re sure you want to remove the plan. Tap “Remove” to confirm. Repeat this process for each eSIM you want to delete. If you want to delete all eSIMs, you’ll need to remove them one by one—there’s no single “delete all” button. After removing the profiles, they’re gone from your device. Your primary physical SIM (if you have one) and any remaining eSIMs will still be active.

For Android devices, the process varies slightly by manufacturer (Samsung, Google Pixel, etc.), but the general approach is consistent. Open Settings. Look for “Connections” or “Network & Internet.” Tap on “SIM Card Manager” or “Mobile Network.” You’ll see a list of your SIMs, including both physical SIMs and eSIM profiles. Tap on the eSIM you want to remove. Look for an option like “Remove,” “Delete,” or “Deactivate.” Confirm the removal. On some Android devices, you may need to first disable the eSIM before the option to remove it appears. Again, you’ll need to repeat this for each eSIM profile you want to delete. If you’re using a Samsung phone, you may also find eSIM management under Settings > Connections > SIM Card Manager, where you can tap the eSIM and select “Remove.”
Before you start deleting eSIMs, there are a few critical precautions to take. First, if you’re deleting the primary eSIM that you use for daily calls and data, make sure you have an alternative way to stay connected. This could mean having a physical SIM installed and active, or ensuring you’re on Wi-Fi so you can download a replacement eSIM later. If you delete your only active cellular plan, your phone will lose all cellular connectivity until you add a new plan. Second, if you’re planning to sell, trade in, or give away your phone, deleting all eSIMs is essential for privacy. An eSIM profile contains carrier account information tied to your identity. Leaving it on the device could allow the next owner to access services under your account or cause confusion if they try to activate their own service. After deleting eSIMs, it’s also a good idea to perform a factory reset on the device to wipe all personal data, but deleting eSIMs first ensures that no residual carrier profiles remain. Third, if you have active eSIMs for travel that you might need again, consider saving the QR codes or activation details somewhere safe before deleting. Some carriers allow you to re-download an eSIM from their app, but others require you to contact support or get a new QR code. For travel eSIMs that have expired or are no longer needed, you can delete them without worry.
Let’s walk through a common scenario to see why and how someone might delete all eSIMs. Consider a user named Alex who travels frequently for work. Over the past year, Alex has accumulated eSIM profiles for trips to Japan, Europe, the UK, and a domestic US plan for a secondary carrier. Each travel eSIM is no longer active because the data packages expired months ago. Alex’s eSIM list in Settings has become cluttered, with four or five inactive profiles showing up. Worse, occasionally the phone tries to auto-connect to one of these expired profiles when signal is weak, causing temporary connectivity glitches. Alex decides to clean house. On an iPhone, Alex goes to Settings > Cellular, taps on each expired eSIM, scrolls down, and taps “Remove Cellular Plan.” After removing all the expired profiles, only the primary physical SIM and the current active eSIM remain. The settings menu is cleaner, and the occasional connectivity hiccup disappears. If Alex ever returns to Japan or Europe, new eSIM profiles can be downloaded fresh without old profiles causing confusion.
Another scenario involves selling a phone. Maria is upgrading from her iPhone 13 to an iPhone 15. Her iPhone 13 has an active eSIM from her carrier. Before wiping the phone, she needs to remove that eSIM. She goes to Settings > Cellular, taps her primary eSIM, and removes it. She then performs a factory reset (Settings > General > Transfer or Reset iPhone > Erase All Content and Settings). When the new owner gets the phone, it has no cellular profiles, ready for them to add their own. Importantly, Maria’s carrier account was not affected by deleting the eSIM—the eSIM profile was just removed from that device. When she sets up her new iPhone 15, she can either download a new eSIM from her carrier’s app or, if her carrier supports it, transfer the eSIM during the phone setup process.
One common question is whether deleting an eSIM deactivates the service with the carrier. The answer is no. Deleting the eSIM profile from your phone does not cancel your service plan. Your carrier still has your account active. If you’ve deleted an eSIM accidentally or changed your mind, you can usually re-add it by scanning the original QR code again, using your carrier’s app to download the profile, or contacting customer support for a new QR code. For postpaid plans from major carriers, re-adding is typically straightforward. For prepaid travel eSIMs that have already expired, there’s usually no need to re-add them anyway.
Another important point: some phones have a limit on how many eSIM profiles they can store. iPhones, for example, can store multiple eSIM profiles but only have two active at a time (one for calls/data and one for secondary use). If you’ve been traveling extensively and have downloaded many travel eSIMs over time, you might eventually hit that storage limit. Deleting old, inactive eSIMs frees up that storage capacity so you can add new ones when you need them. This is particularly relevant for frequent travelers who rely on eSIMs for connectivity in different countries.
If you’re preparing to sell your phone or give it to a family member, deleting all eSIMs is just one part of the data-wiping process. After removing eSIM profiles, you should also sign out of iCloud or your Google account, unpair any connected devices like the Apple Watch, and perform a factory reset. This ensures that no personal data—including eSIM carrier information—remains on the device. For iPhones, the “Erase All Content and Settings” option will also remove eSIM profiles, but it’s a good habit to manually remove them first to ensure no activation lock issues later.
Let’s address a specific scenario for dual-SIM users. If you use both a physical SIM and an eSIM, and you want to delete the eSIM while keeping the physical SIM active, the process is the same: just remove the eSIM profile. Your physical SIM will continue to work normally. If you’re using two eSIMs simultaneously and want to remove one, simply remove the profile for the one you no longer need. The remaining eSIM stays active.
A final note on timing: if you’re planning to travel internationally and want to use a travel eSIM, it’s often best to install it before you leave but keep it inactive until you arrive. After your trip, once you’re back home and no longer need that travel eSIM, delete it to keep your settings clean. This prevents the phone from occasionally trying to connect to a foreign network when you’re back in your home country, which can sometimes cause brief connectivity hiccups.
Deleting eSIMs is a simple maintenance task that every smartphone user should know how to do. Whether you’re cleaning up old travel profiles, preparing to sell your device, or troubleshooting connectivity issues, the ability to remove eSIM profiles gives you control over your device’s cellular setup. The process takes only a few seconds per profile and is completely reversible—you can always re-add a valid eSIM later. So don’t be afraid to clear out the clutter. Your settings menu will thank you. Deleting eSIM profiles removes the digital SIM data from your device without canceling carrier service. On iPhone, go to Settings > Cellular, tap the plan, and select “Remove Cellular Plan.” On Android, navigate to Settings > SIM Card Manager, select the eSIM, and choose “Remove.” Always ensure you have an active connection alternative before deleting your primary eSIM.
I had no idea I could delete old travel eSIMs until I saw this. I had like six expired eSIMs from past trips just sitting in my settings. Cleaned them all out in two minutes and my cellular menu is so much cleaner now. Thanks for the guide!
Just sold my old iPhone and used this guide to wipe all eSIMs before factory resetting. Felt good knowing the next owner won’t have any of my carrier info lingering. Super easy process.
For Android users: the process might be slightly different depending on your phone. On my Pixel, I go to Settings > Network & Internet > SIMs, then tap the eSIM and hit “Erase SIM.” Works perfectly every time.
Important warning: if you delete your primary eSIM, make sure you have a way to get it back. I removed mine accidentally while trying to clean up old profiles and had to call my carrier to get a new QR code. Not a disaster, but definitely an inconvenience. Read carefully before tapping remove!
I wish there was a “delete all” button for eSIMs. I had to remove nine old travel eSIMs one by one. Took a few minutes but worth it for the clean slate. Maybe Apple will add a batch delete option someday.