
How to Delete an eSIM from Your iPhone? Here’s the Simple Step‑by‑Step Guide
If you’ve been using an eSIM—whether for travel, a secondary line, or your primary carrier—there may come a time when you want to remove it from your iPhone. Perhaps you’ve returned from a trip and no longer need the travel eSIM, or you’re selling your phone and want to ensure all personal data is wiped. Deleting an eSIM is a straightforward process, but it’s important to understand what happens when you remove it and what to consider before doing so. This guide walks you through exactly how to delete an eSIM on iPhone, along with tips to avoid accidental loss of important lines.
First, let’s clarify what deleting an eSIM actually does. When you remove an eSIM from your iPhone, you are deleting the digital profile from the device. That specific line will no longer appear in your Settings, and your phone will stop using it for cellular service. However, the eSIM itself—the digital credential issued by your carrier—is not destroyed. It remains on the carrier’s side, inactive, unless you re‑download it. This means that if you delete an eSIM by accident, you can often reinstall it later, provided it’s still within its validity period (for travel eSIMs) or if your primary carrier can re‑issue it.
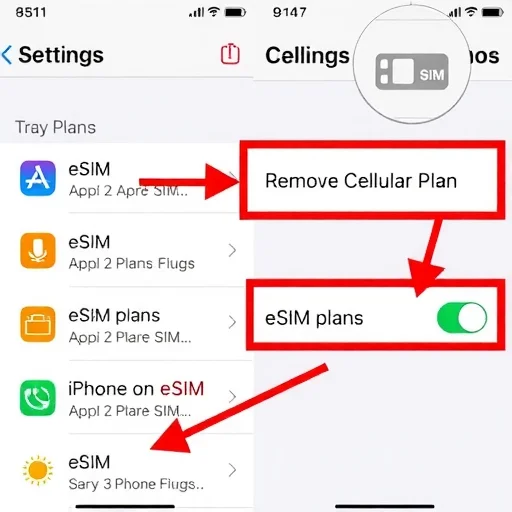
The process to delete an eSIM on an iPhone is simple and consistent across all models running recent versions of iOS. Here are the exact steps:
Open the **Settings** app on your iPhone.
Tap **Cellular** (or **Mobile Data**, depending on your region).
Under the “Cellular Plans” section, you’ll see a list of all active and inactive eSIM profiles on your device. Tap on the eSIM you want to delete.
Scroll down to the bottom of the screen and tap **Remove Cellular Plan**.
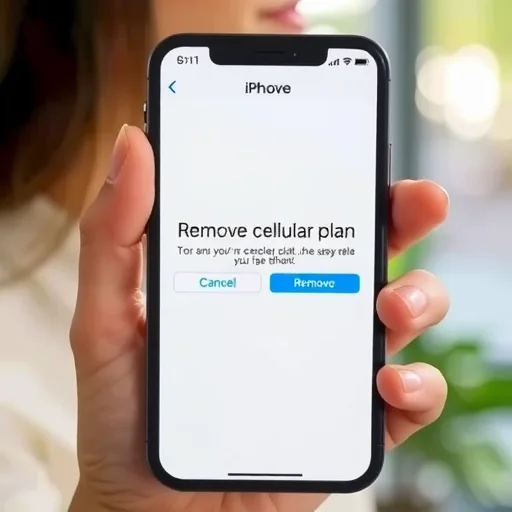
A confirmation dialog will appear, asking if you’re sure you want to remove the plan. Tap **Remove** to confirm.
That’s it. The eSIM profile is now deleted from your iPhone. You’ll notice that the line no longer appears in your Cellular settings, and any associated service (calls, data, SMS) is no longer available through that eSIM.
Before you delete an eSIM, there are a few important considerations. If you’re deleting your primary carrier eSIM (the one that provides your main phone number and service), make sure you have an alternative way to make calls and use data. If you have a physical SIM from the same carrier, you can use that instead. If you’re deleting a travel eSIM, ensure that you don’t still need data for the remainder of your trip. Once deleted, you won’t be able to use the remaining data unless you reinstall it.
Now, let’s talk about why you might want to delete an eSIM. The most common reason is to clean up after a trip. Travel eSIMs often have a fixed validity period, and after they expire, they serve no purpose other than cluttering your settings. Deleting them keeps your Cellular menu tidy and reduces the chance of accidentally selecting the wrong plan when you’re trying to switch lines. Another reason is privacy: if you’re selling or giving away your iPhone, you should delete all eSIMs to ensure no one can use them. A factory reset alone may not always remove eSIMs (depending on iOS version), so manually deleting them is a prudent step.
If you’re someone who frequently uses multiple eSIMs—for example, a primary line and travel eSIMs—you might prefer to disable rather than delete. Disabling an eSIM keeps the profile installed but turns off the line. To disable, go to Settings > Cellular, tap the plan, and toggle off “Turn On This Line.” The eSIM remains available for future use without needing to reinstall. This is especially useful if you travel to the same destination regularly and plan to reuse the same eSIM profile (with a new plan).
What about eSIMs that you’ve deleted by accident? If you delete a travel eSIM that still has valid data, you can usually reinstall it using the original QR code or through the provider’s app. Many travel eSIM providers keep your plan available for reinstallation as long as the validity period hasn’t expired. If you deleted your primary carrier eSIM, you can either re‑download it via Settings > Cellular > Add Cellular Plan (if your carrier supports it) or contact your carrier to have them re‑issue the eSIM.
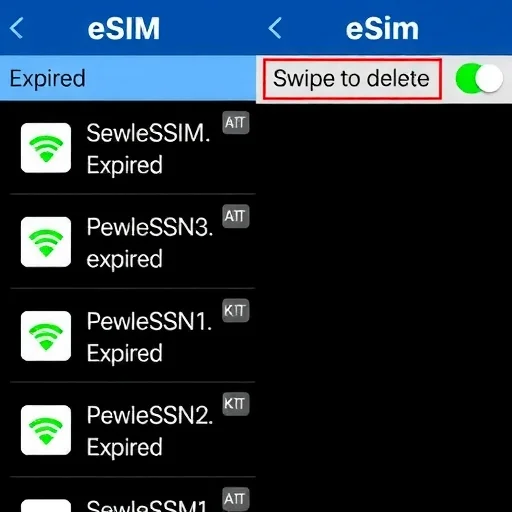
I recently helped a friend who had accumulated six old travel eSIMs on her iPhone. She had no idea which ones were still active and was worried about accidentally selecting the wrong one when switching plans. We went through Settings, identified the expired ones (by checking the validity dates in the provider’s apps), and deleted them one by one. Her Cellular menu went from cluttered to clean, and she felt much more confident managing her active lines.
Another common scenario: when selling an iPhone, people often forget that eSIMs stay on the device even after a factory reset. While newer iOS versions may remove eSIMs during the erase process, it’s not guaranteed for all carriers or older iOS versions. To be absolutely sure, manually delete all eSIMs before performing the factory reset. Go to Settings > Cellular, tap each eSIM, and select “Remove Cellular Plan.” Once all eSIMs are deleted, then go to Settings > General > Transfer or Reset iPhone > Erase All Content and Settings. This ensures that the next owner cannot access any cellular plan tied to your account.
If you’re switching from an eSIM back to a physical SIM, deleting the eSIM is part of the process. After you insert the physical SIM and confirm it’s working, you can safely remove the eSIM profile to avoid confusion. Similarly, if you’re moving to a new iPhone and setting up eSIMs on the new device, you may want to delete the old eSIMs from your previous phone after the transfer is complete.
Ultimately, deleting an eSIM from an iPhone is a simple, quick process that takes only a few taps. Whether you’re cleaning up after a trip, preparing to sell your device, or just organizing your settings, the steps are the same. Just remember to double‑check that you’re deleting the right plan, especially if you have multiple eSIMs with similar names. Labeling your plans clearly (Settings > Cellular > tap the plan > “Cellular Plan Label”) can prevent accidental deletions. To delete an eSIM on iPhone: go to Settings > Cellular, tap the eSIM, scroll down, and tap “Remove Cellular Plan.” Consider disabling instead of deleting if you may reuse the eSIM. Always verify you’re deleting the correct plan, and manually delete eSIMs before selling or resetting your iPhone for complete privacy.
DeleteESIMGuideFINISHED

Accidentally deleted a travel eSIM with data left. Was able to reinstall it through the provider’s app because the validity hadn’t expired. Don’t panic if you delete one—it’s often recoverable.
I’m selling my old iPhone and wanted to make sure all eSIMs were gone. Deleted them manually, then did a factory reset. Peace of mind. Thanks for the clear steps.
Disabling is so much better than deleting if you might use the eSIM again. I disabled my Japan eSIM after my trip, and when I returned, I just re-enabled it and bought a new plan. No QR code needed. Perfect.
I had six old travel eSIMs cluttering my settings. Followed this guide and cleaned them all up in a few minutes. My Cellular menu is so much cleaner now. Great advice!
Important tip: Before deleting your primary eSIM, make sure you have a backup way to get calls and data. I almost deleted mine without realizing I’d lose service. This guide reminded me to check first.