
Preparing to Sell Your Phone? Here’s How to Delete eSIM and Erase Data Properly
You’re about to sell your old phone, trade it in, or pass it to a family member. You know you need to wipe your personal data, but with the rise of eSIMs, there’s an extra step that many people overlook. The core solution is straightforward: deleting your eSIM and erasing all data are two separate but equally important steps that together ensure your phone is completely clean before it leaves your hands. In this guide, I’ll walk you through exactly how to delete eSIM profiles on both iPhone and Android, how to perform a full factory reset that wipes all personal data, and why doing both in the right order protects your privacy and prevents headaches for the next owner.
First, let’s understand why both steps matter. A factory reset—sometimes called “erase all content and settings”—removes your personal data like photos, messages, accounts, and app data from the phone. It restores the device to a state that looks like it just came out of the box. However, on many devices, a factory reset does not automatically delete eSIM profiles. An eSIM is a digital SIM embedded in your phone, and it contains your carrier account information, your phone number, and authentication details that tie you to your mobile network. If you sell a phone with an active eSIM still on it, the next owner could potentially use your cellular plan, or at the very least, they might run into activation issues when trying to add their own service. Deleting your eSIM before you reset ensures that your carrier information is completely removed from the device, giving you privacy protection and giving the new owner a clean slate.
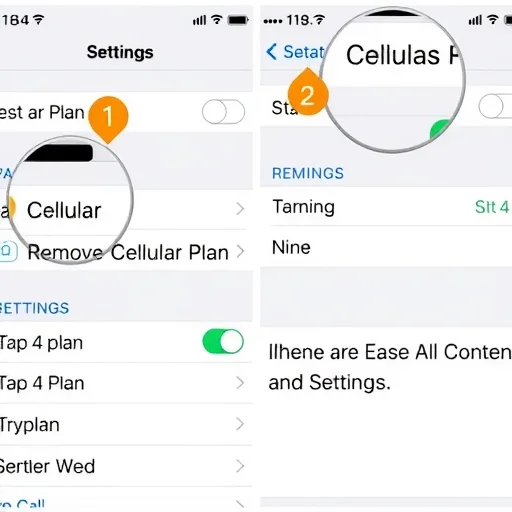
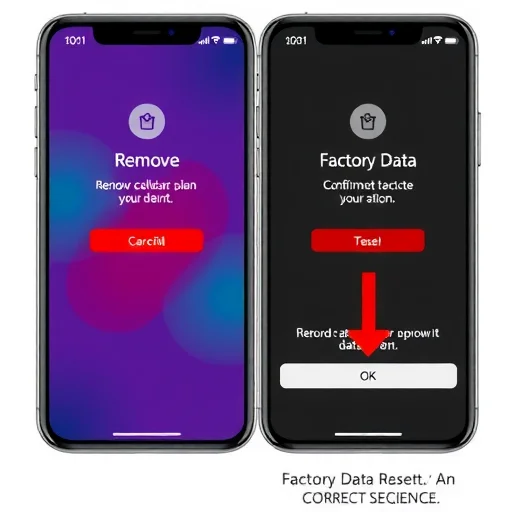
Now, let’s get into the step-by-step process, starting with iPhones. Deleting an eSIM on iPhone is quick and should be done before you perform the factory reset. Open Settings. Tap on “Cellular” (or “Mobile Data”). You’ll see a list of your cellular plans under “Cellular Plans.” If you have an eSIM as your primary line or as a secondary travel line, it will appear here. Tap on the eSIM plan you want to delete. Scroll to the bottom of that plan’s settings page. Tap the red button labeled “Remove Cellular Plan.” Confirm by tapping “Remove” on the pop-up. If you have multiple eSIMs—for example, a primary line plus a travel eSIM from a past trip—repeat this process for each one until all eSIMs are deleted. Once your eSIMs are removed, you’re ready to erase all data. Go to Settings > General > Transfer or Reset iPhone. Tap “Erase All Content and Settings.” You’ll be prompted to enter your passcode and Apple ID password to confirm. This process wipes all personal data, signs you out of iCloud, and leaves the iPhone in a clean, out-of-box state—now with no eSIM profiles lingering.

For Android devices, the process is similar but varies slightly by manufacturer. Let’s cover both Samsung and Google Pixel as the most common examples. On Samsung Galaxy devices, first delete your eSIM. Open Settings. Tap on “Connections.” Tap on “SIM Card Manager.” You’ll see a list of your SIMs—both physical and eSIM. Tap on the eSIM you want to delete. Tap “Remove” and confirm. Repeat for any additional eSIM profiles. After all eSIMs are removed, perform the factory reset. Go to Settings > General Management > Reset > Factory Data Reset. Tap “Reset” and then “Delete All.” On Google Pixel and stock Android devices, delete the eSIM first: Settings > Network & Internet > SIMs. Tap the eSIM you want to remove. Tap “Erase SIM” and confirm. Then factory reset: Settings > System > Reset Options > Erase all data (factory reset). Tap “Erase all data” and confirm.
One critical question is whether you need to delete your eSIM before resetting if you’re planning to keep the same phone number on a new device. The answer depends on your carrier and how you’re transferring service. Many carriers now support eSIM Quick Transfer, which allows you to move your eSIM from your old phone to a new one during setup. In this case, you don’t delete the eSIM from the old phone manually; the transfer process removes it automatically. However, if you’re not using Quick Transfer—for example, if you’re switching carriers, selling the phone to someone else, or simply want a clean break—then manually deleting the eSIM before resetting is the safest approach. It ensures that no carrier profile remains, even if the transfer process encounters an issue.
Let’s walk through a real-world example to see why this sequence matters. James is selling his iPhone 14 to a friend. His iPhone 14 uses an eSIM from his carrier as his primary line. He knows he needs to wipe his data, but he’s heard that a factory reset should take care of everything. He goes to Settings > General > Transfer or Reset iPhone and taps “Erase All Content and Settings.” The phone wipes and restarts, showing the “Hello” setup screen. He hands it to his friend. When his friend tries to activate the phone with their own carrier, they get an error: the phone still shows that an eSIM from James’s carrier is installed, and they can’t add a new one without removing it first. James has to take the phone back, go through setup again, manually delete the eSIM (which requires connecting to Wi-Fi), and then factory reset once more. If James had deleted the eSIM before the factory reset, this entire hassle would have been avoided. The correct order is: delete eSIM(s) first, then factory reset.
Another scenario involves someone who uses a physical SIM for their main line but has a travel eSIM installed from a recent trip. In this case, deleting the travel eSIM before resetting is still a good practice. While the travel eSIM may have expired, leaving it on the phone adds clutter and could confuse the next owner. The physical SIM is removed physically—you’ll take it out of the phone before handing it over—but the eSIM needs to be removed digitally. The process is the same: delete the eSIM through settings, then factory reset.
What about users who are trading in their phone to a carrier or through a manufacturer program? The same principles apply. Even if you’re sending the phone to a company that will refurbish it, deleting your eSIM ensures that your carrier information isn’t left on a device that will pass through multiple hands. It’s a simple privacy measure that takes less than a minute and gives you peace of mind.
One important technical detail: on some iPhones running iOS 16 or later, the “Erase All Content and Settings” option may include a checkbox that asks whether you want to remove eSIMs as part of the reset. If you see this option, you can select it, and the eSIM will be deleted automatically during the reset process. However, this option doesn’t appear in all scenarios—for example, if your eSIM is tied to a specific carrier setup, you may still need to delete it manually. The safest approach is to manually delete eSIMs before initiating the factory reset, regardless of whether you see the checkbox. This ensures nothing is missed.
For Android users, the factory reset process typically does not delete eSIMs. You must remove them manually beforehand. Some newer Android devices may prompt you during reset, but it’s not universal. Manual deletion is the reliable method.
Let’s talk about what happens after you delete an eSIM. Does it cancel your service? No—deleting the eSIM from your phone does not cancel your carrier plan. Your account remains active. If you’re moving to a new phone, you’ll either transfer the eSIM during setup or download a fresh eSIM from your carrier’s app. If you’re selling the phone and no longer need the service, you’ll need to contact your carrier separately to cancel your plan. Deleting the eSIM just removes the profile from the device; it doesn’t affect your billing or account status.
A final consideration: if you’re selling your phone and also have a physical SIM installed, don’t forget to remove it. Physical SIMs contain your account information just like eSIMs. After you’ve deleted all eSIMs and performed the factory reset, remove the physical SIM tray and take out the card. The phone is now completely free of any carrier-related information and ready for its new owner.
Now, let’s put it all together in a clear checklist for anyone preparing to sell or hand off their phone. Step one: back up your data if you want to keep it. Step two: sign out of iCloud or your Google account. Step three: delete all eSIM profiles from the device (Settings > Cellular > Remove Cellular Plan on iPhone; Settings > Connections > SIM Card Manager > Remove on Samsung; Settings > Network & Internet > SIMs > Erase on Pixel). Step four: remove any physical SIM card. Step five: perform a factory reset (Erase All Content and Settings on iPhone; Factory Data Reset on Android). Step six: if the phone restarts and shows the setup screen, you’re done—the device is clean and ready for its next owner.
This sequence takes about five minutes but saves potential privacy headaches and ensures a smooth transition for whoever gets your phone next. Whether you’re selling online, trading in, or passing it to a family member, taking these extra steps shows that you care about protecting your information and making the process easy for the next user. When preparing to sell or hand off your phone, delete all eSIM profiles before performing a factory reset. On iPhone: Settings > Cellular > Remove Cellular Plan, then Erase All Content and Settings. On Android: remove eSIMs via SIM Card Manager or Network & Internet settings, then factory reset. Remove physical SIMs and sign out of accounts for a completely clean transfer.
On my Samsung, I couldn’t find the eSIM delete option at first. Turns out I had to go into SIM Card Manager and tap the eSIM first to see the remove button. Once I found it, super easy. Deleted my old travel eSIM before factory reset and everything went smoothly.
I was trading in my Pixel 6 and used this checklist. Deleted eSIM, factory reset, removed physical SIM. The trade-in kit arrived and I just dropped it in. No issues with the trade-in assessment. Glad I did it right.
I learned this the hard way. Sold my iPhone to a coworker and thought a factory reset was enough. He couldn’t activate his service because my old eSIM was still on the phone. Had to meet up again, delete it manually, and reset again. Now I always delete eSIMs first. Great guide.
One thing to add: if you’re using eSIM Quick Transfer to move to a new iPhone, you don’t need to manually delete the eSIM first. The transfer removes it automatically. But if you’re selling to someone else, definitely delete it manually to be safe.
The step about signing out of iCloud/Google is so important too. Even after factory reset, if you don’t sign out first, activation lock can still be on. This guide covers all the bases. Bookmarked for next time I sell a phone.